
This is all taken from Moe Kinani here: https://cloudbymoe.com/f/windows-laps—power-app, and I will be referencing the instructions there throughout. However, the instructions there are a little bare for my smooth brain and there were a few hurdles I needed to get over, either because I didn’t understand the documentation properly, or because there have been changes to the platform since this was posted. I’ll also editorialize here a bit as is my wont. Make sure to follow along over there, though.
Azure VM
We’ll need to set up an Azure VM. I won’t do into much detail here because there’s a lot of choices that go into making that that are your own. This VM is only going to be used to run some Microsoft Graph Powershell commands, so it doesn’t need to be beefy. I also know in my environment that this doesn’t need 100% uptime. I can still get to the LAPS passwords in Azure AD or Intune, so I chose basically the cheapest option of VM that also lets Microsoft shutdown my VM at any given time if they need the resources. That’s a tradeoff I’m good with. I also have the VM to shutdown every night at 6 PM, because I know I won’t have any need for it after that point using the built in tools for the VM. I also have it automatically turning back on 5 AM, which uses a different set of tools that I will detail later.
Once you’ve got a VM, get into the VM and run:
Set-ExecutionPolicy -ExecutionPolicy RemoteSigned -Scope AllUsers
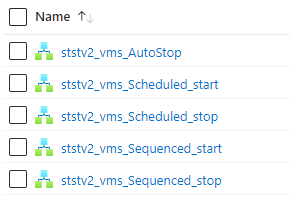
Install-Module Microsoft.Graph -Scope AllUsersTo set up VM auto-start and auto-stop, there are instructions here to set it up: Azure VM Start/Stop V2. The long and the short of it, though, is to go to their GitHub page linked in the above instructions and install it in your Azure instance. Then, in Azure, look for “Logic Apps.” In there, you’ll see some new stuff that looks like this.
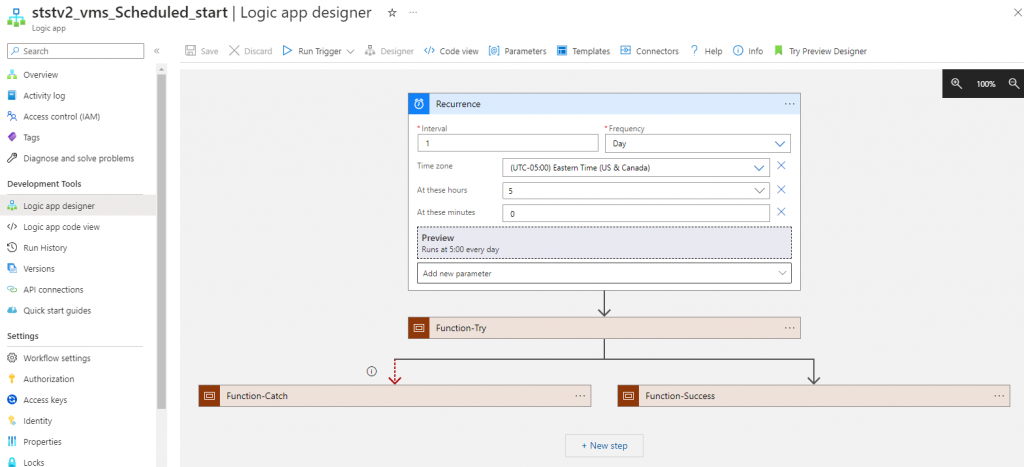
Here are my settings.
Registered Apps
This part was very straightforward and you can follow Moe’s instructions on how to set up the two registered apps you’ll need. One will be used to get information on user accounts, and the other will be used to get the LAPS password for the machine.
Azure Automation Account
Again, Moe’s instructions are largely fine. However, there’s an issue with his scripts that you download from his GitHub.
In the test script, in line #19, you need to convert the string to a secure string before Connect-MGGraph will use it. Replace line #19 with the following:
$Token = $Connection.access_token | ConvertTo-SecureString -AsPlainText -Force$Token = $Connection.access_tokenThis also means that in his second script, you’ll need to replace line #25 with the above as well.
If you run either script, you’ll notice that when Connect-MgGraph -AccessToken $Token is run, you get a ton of stuff in your output.
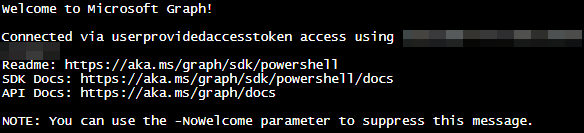
All of this will mess with your PowerAutomate flow later. When Moe wrote his instructions, all that we received back was a simple “Welcome to Microsoft Graph” and so he has a compose step that gets rid of this as part of the flow. Since then, Microsoft has added more junk in here.Thankfully, we can edit line #28 and add -nowelcome to the end to get rid of all of this and the need for that compose transform.
The rest should work.
PowerAutomate
Go ahead and import WindowsLAPSStep1 from his GitHub. This can be done from the My Flows tab and choosing the Import dropdown and picking “Import Package (Legacy).” A note on this step. WindowsLAPSStep1 uses the legacy “PowerApps” app in its first step. You’ll see why this is an issue in the next step. At present it’s still working, but I imagine that at some point this will be deprecated, so keep this in mind if it’s not working.
This next step is where things start to really diverge from Moe’s instructions, and it’s entirely because the PowerApps app is in the process of being deprecated. You can’t pick it, only “PowerApps (V2),” which works differently but ultimately still gets the job done.
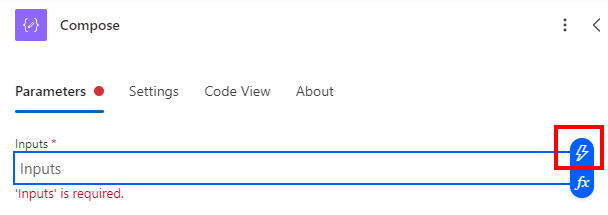
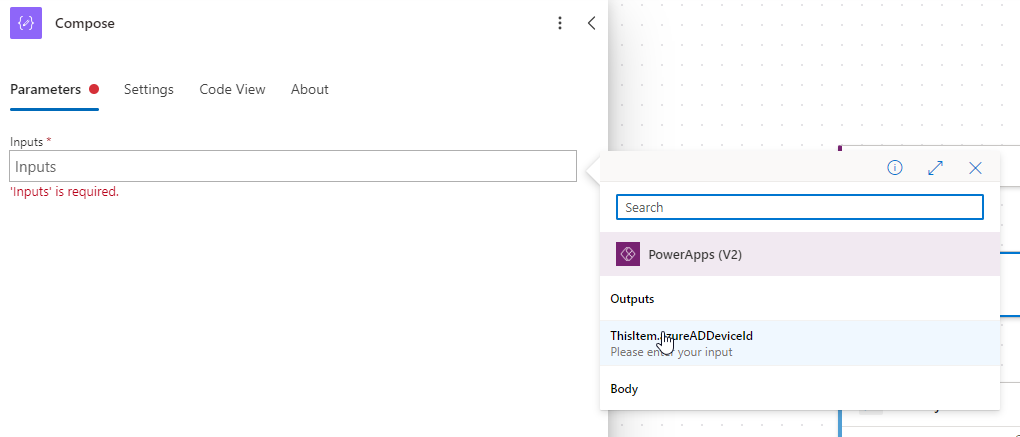
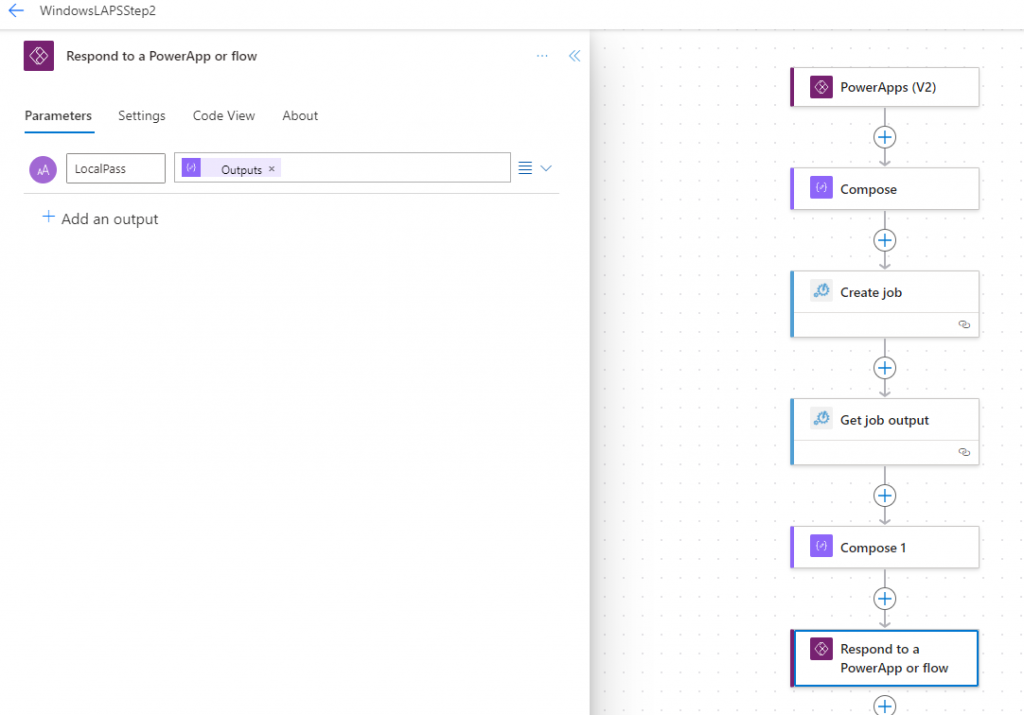
Start with PowerApps (V2) and add a Text input. In the first field, put in ThisItem.azureADDeviceId. Leave the rest of it default.
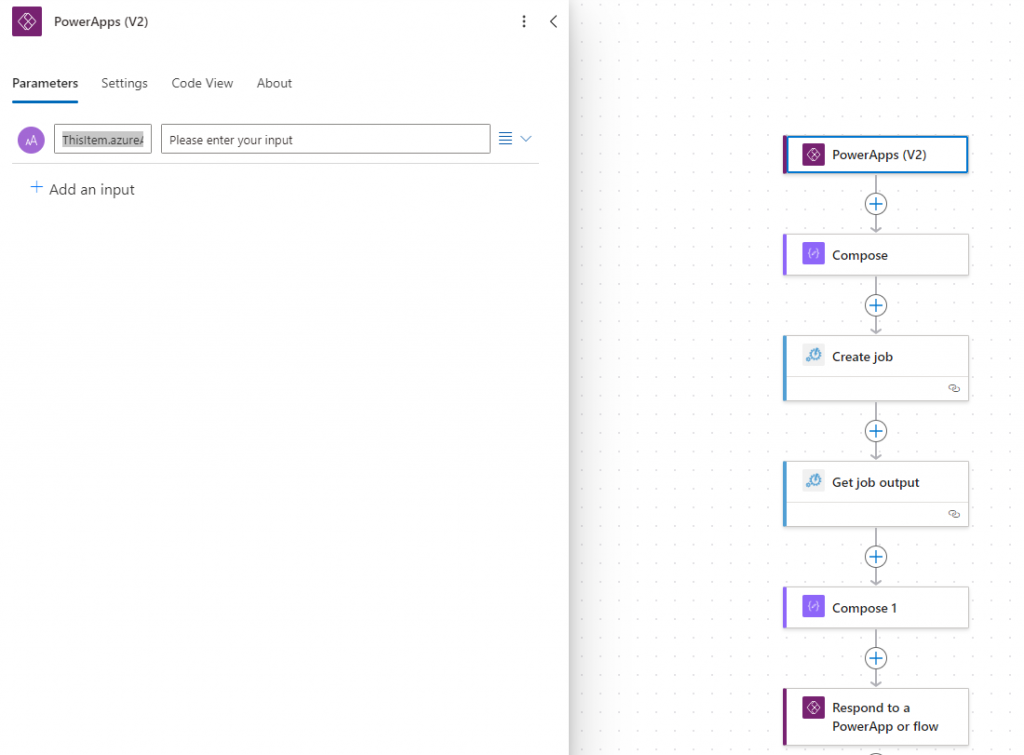
Next, add a Compose. Click the little lightning symbol, then choose ThisItem.azureADDeviceId. This brings that value into the flow in a way that we can use.
Next, add an Azure Automation Job
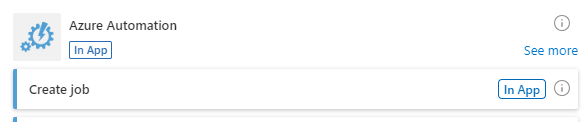
Here, you’ll specify details about the runbook you want the job to run. This is all the stuff we set up back in the “Azure Automation Account” step. The last field will use the output from the previous Compose step.

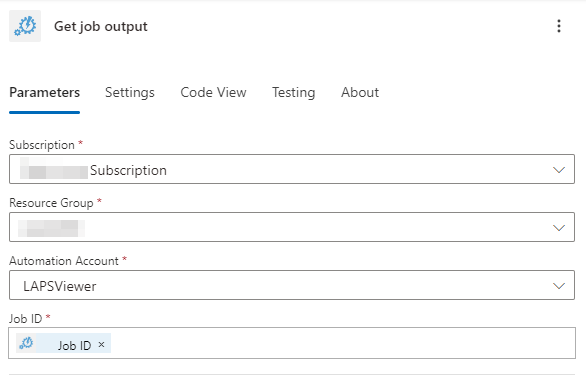
Next, we’ll create an Azure Automation Get Job Output action.
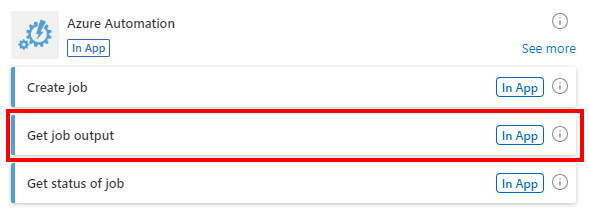
We’ll set that up to get the output of the job we created in the previous step.
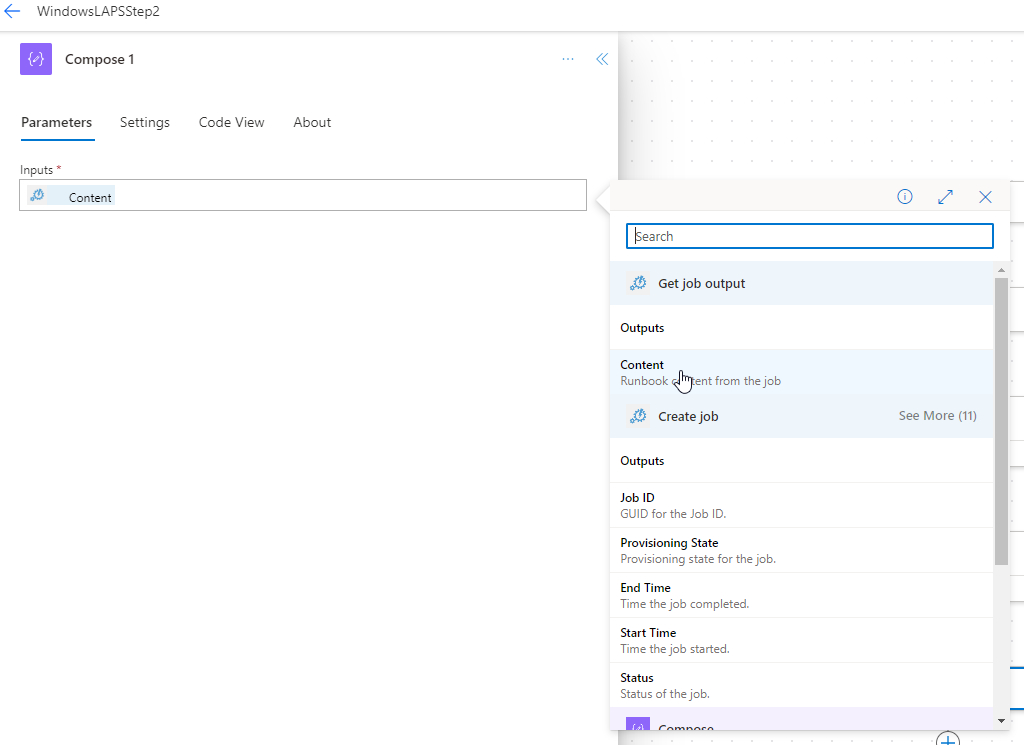
Next, we’ll add another Compose action to parse the result back into a string.
Finally, we’ll add a “Respond to a Powerapp or flow” action. We’ll add a text input named “LocalPass” with a value that is the output from the previous step’s compose string.
PowerApp
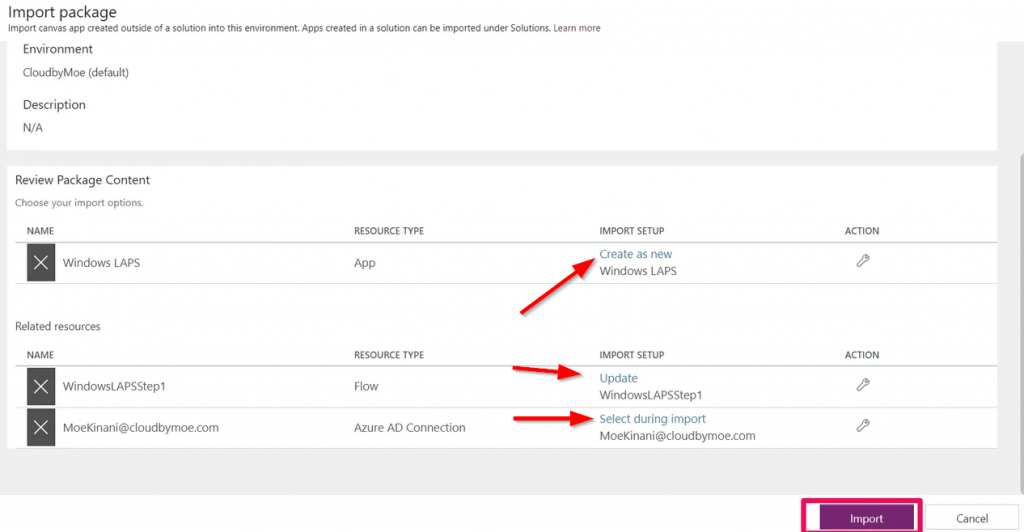
Once again, Moe’s got a nice little package for WindowsLAPSStep1 that can be downloaded from his GitHub and can be imported into PowerApp. Something that confused me was that, once you upload the Zip file, you’ll need to do some things the on the resulting page before you can click Import. You’ll need to click the spots marked with arrows and perform the required actions.
You can follow the rest of Moe’s instructions from here, but I made some significant tweaks to his imported app that I’ll detail below. But, at this point, if you finish out Moe’s instructions, you should have a working app that will pull Windows LAPS passwords for computers in AzureAD/Intune. I have it published and shared with specific users, and have it published to Microsoft Teams. Users are then able to go to the Apps section of Teams and install the app both on their desktop client and on their phone apps.
Licensing
You will need some kind of licensing for this app, since it uses Premium sources (Azure AD). At present, you either get licensing for each individual user that will be using this app. Or, you can get Per App licenses, which will then let any user this app is shared with use the app as long as there is an available license. In other words, you can either get named licenses (license per user) or a concurrent license (the Per App licenses). In my case, we so very rarely get passwords that it’s unlikely we’ll need to lookup passwords simultaneously enough as to need anything except a Per App license so the entire helpdesk staff can use the app.
PowerApps Customization
Spinning Load Icon
Probably as a result of using such a low power VM, my search takes a really long time when you click “Get LAPS.” On average it’s about a minute of waiting. Not a major problem for my use case, but sometimes you start to wonder if it’s really working. While there is a very very subtle little thing going on at the top of the screen, it’s way too subtle. So instead, I went to Loading.io and grabbed a loading spinner I liked that was free. I saved it as an SVG and uploaded it to the Media tab of the app. I then placed it on the screen, along with two text boxes, one that says the app is running, and another that says “No really, it’s running” after 10 seconds.
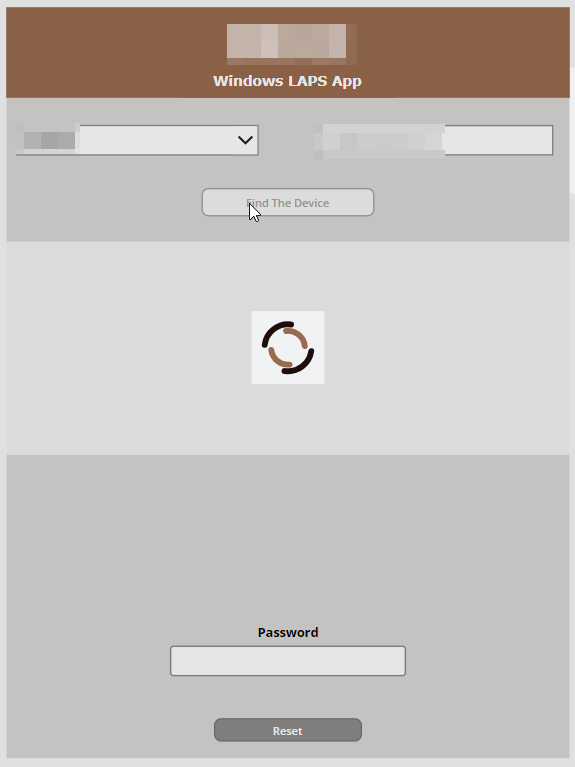
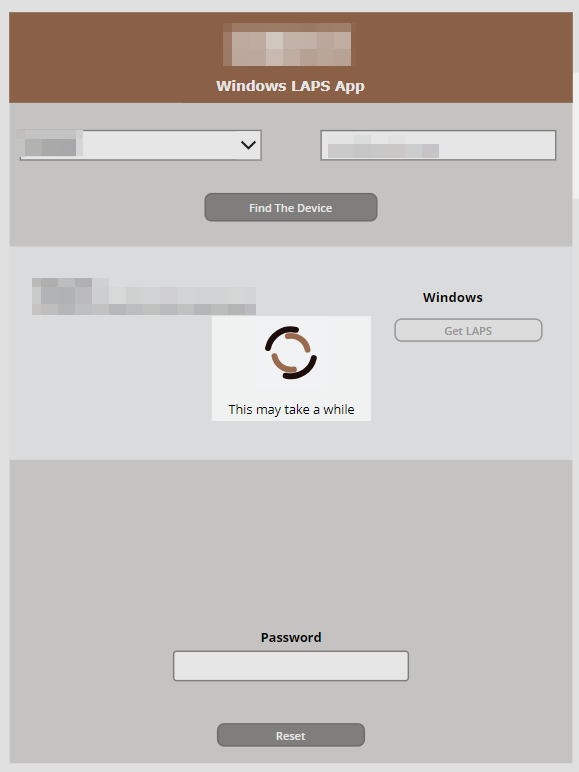
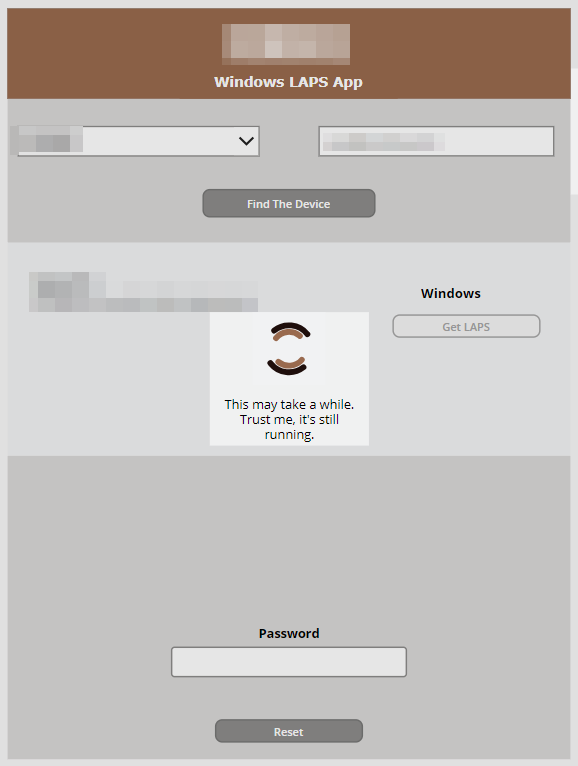
And while I’m at it, I also added a spinning wheel when clicking “Find the Device.” It’s a pretty inconsequential amount of time, but it provides continuity and trust in the app seeing the same elements when waiting.
Now, before I move on, I want to note that I changed the names of a bunch of the elements on the screen from the defaults that Moe used. This was to help me to understand what was doing what. I’m not going to change my stuff back, so just know that you might need to go searching for the elements I’m referencing. I hope I gave them fairly obvious names.
Add the spinner, and the two text boxes onto your screen and position them where you’d like them. The key here will be using the “Visible” property of elements in the advanced tab. In the spinner’s visible property, set it to locShowSpinner. Set the visible property on each of the two text boxes to ShowTimer1 and ShowTimer2 respectively, based on which will show first before the other. These elements should now disappear.
Now add a Timer. Set it somewhere on the screen, but set the visible property to false. This can be set to true just for troubleshooting. In the timer’s advanced tab, set the following:
OnTimerEnd:UpdateContext({ShowTimer1: false});
UpdateContext({ShowTimer2: true});
Duration:(Whatever you want in ms)
Now, on the “Find the Device” button element, in the advanced tab, put the following in the onSelect field:
// show the spinner
UpdateContext({locShowSpinner: true});
// Get Computer info
ClearCollect(MK6,WindowsLAPSStep1.Run(TextInput_FQDN.Text));
// hide the spinner
UpdateContext({locShowSpinner: false});
Then, on the “Get LAPS” button, put the following in the onSelect field:
// show the spinner
UpdateContext({locShowSpinner: true});
UpdateContext({ShowTimer1: true});
// start timer
UpdateContext({TimerGo: true});
// load data before going to next screen
Set(LABS_VAR,WindowsLAPSStep2.Run(ThisItem.azureADDeviceId).localpass);
// reset timer
UpdateContext({TimerGo:false});
Reset(Timer);
// hide the spinner
UpdateContext({locShowSpinner: false});
UpdateContext({ShowTimer1: false});
UpdateContext({ShowTimer2: false});
Finally, create a Text box that fills the entire screen is placed between all of these new elements and the rest of what Moe has. Name it something like “ClickShield” and in the visible field set it to locShowSpinner. This will prevent people from interacting with things while the app is searching.
Reset Button
Once you’ve searched for something, everything is left in the all of the fields where they were. This can make running another search confusing. So, I created a reset button at the bottom of the page.
Create a button, and in the onSelect field. put the following:
Set(LABS_VAR, "");
Clear(MK6);
Set(varReset, true);
Set(varReset, false);
Then edit the Reset property of the ComboBox dropdown with all your user’s names with varReset. Now when you click that button, everything should clear and reset back to the defaults.
Grey Out “Find The Device” when FQDN Field is Empty
During normal workflow, you should be finding a user in your drop down, and then when you select them that should fill in the field next to it with their FQDN, which is what the app uses to find assigned machines. But what if somehow that field gets blanked out? When you click “Find The Device” you’ll get an error about the upstream server not responding, since you gave it a null value. To make sure this doesn’t happen and to streamline the user experience a bit, we can “disable” the “Find The Device” button until there’s a value in there. Find the “DisplayMode” property of the “Find The Device” button and add the following:
If(IsBlank(TextInput_FQDN.Text),DisplayMode.Disabled,DisplayMode.Edit)


